Feedback displays information about the used skill and request and response parameters.
At the moment feedback works when using the Assistant through the chat interface, but feedback cannot be connected when using the Assistant through the widget.
The Feedback tab is displayed by clicking the Start feedback button in the Assistant chat and displays information about the feedback: the workflow used and the request and response parameters. Read more 1.9 Chat page
Feedback means to launch systematic replies of the Assistant to the user's request.
By default, the Feedback tab is opened in read mode.
The Edit mode of the Feedback tab is opened by clicking the Edit button.
Feedback tab in reading mode
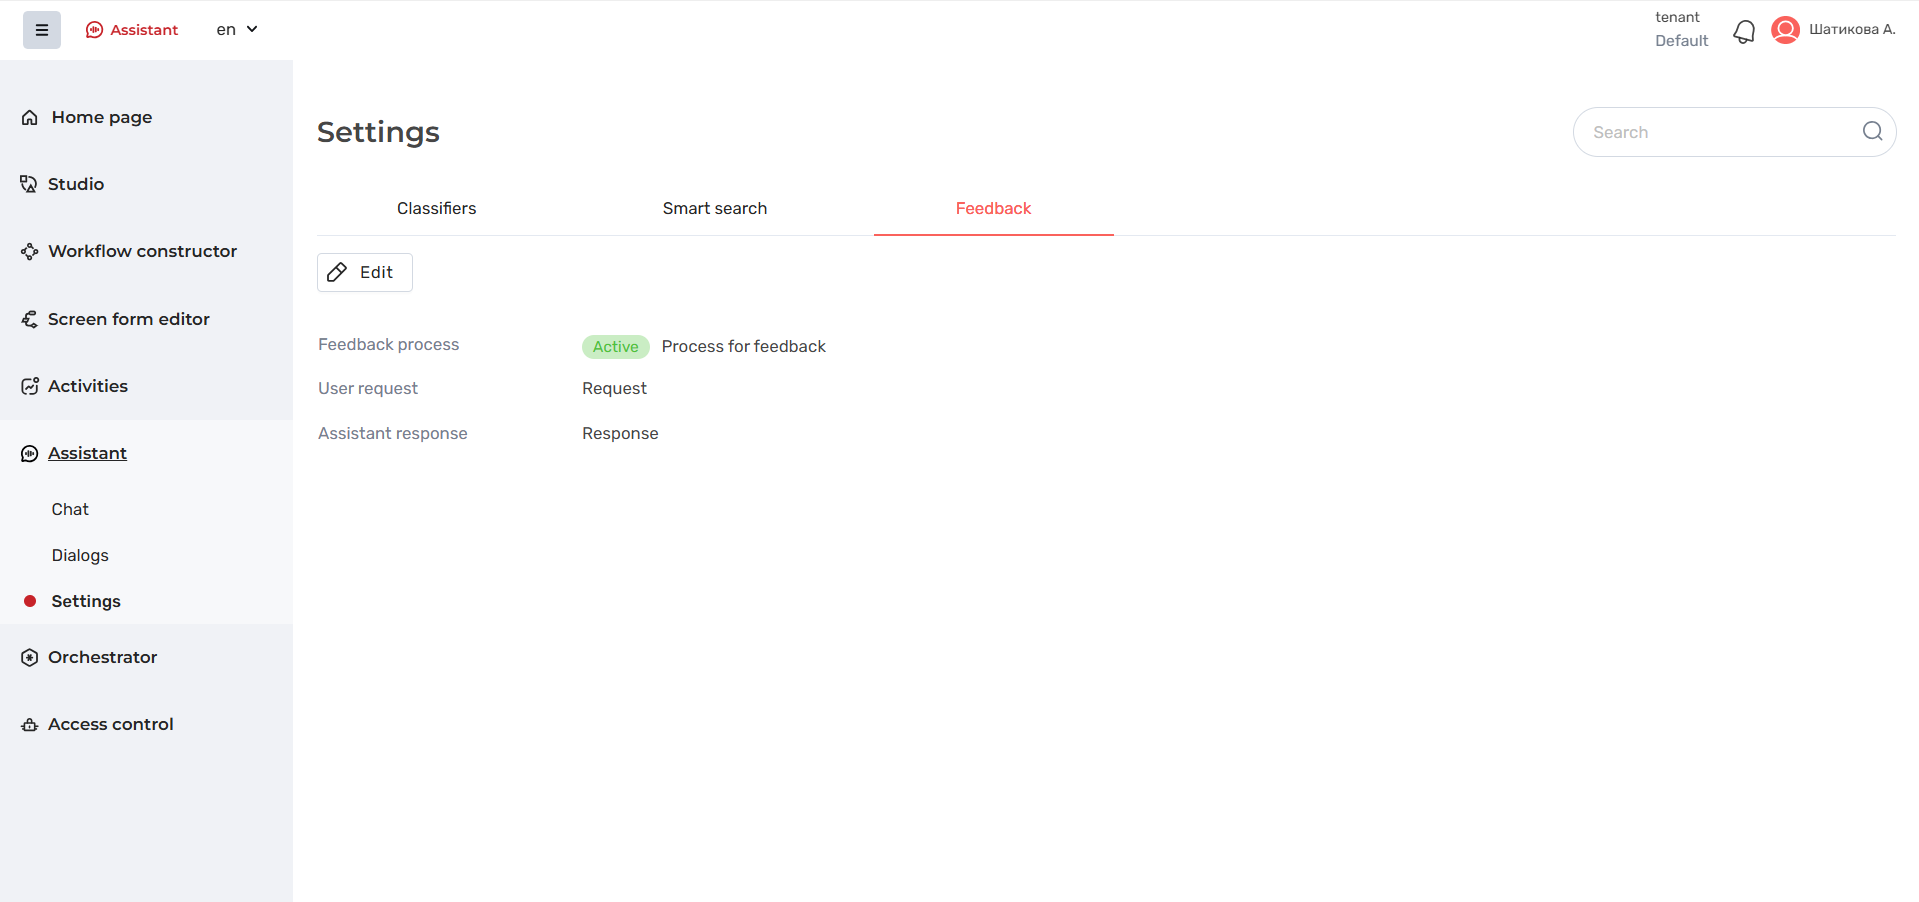
Description of the interface elements of the Feedback tab in the reading mode
The description of the interface elements of the Feedback tab in the reading mode is provided in the table below.
Element name | Description |
|---|---|
Button Edit | If you click on it, the page goes to the editing mode. More details in the requirements for the Feedback tab in the editing mode |
Button Feedback workflow |
|
Field User request |
|
Field Assistant's answer |
|
Feedback tab in edit mode
If you click on the Edit button, you will be able to edit the Feedback workflow:
- published workflows with two input parameters of text type are available in the Feedback workflow field
- the Assistant's response field is filled in automatically after selecting a parameter in the User request field
- feedback is present only for the Assistant's text responses
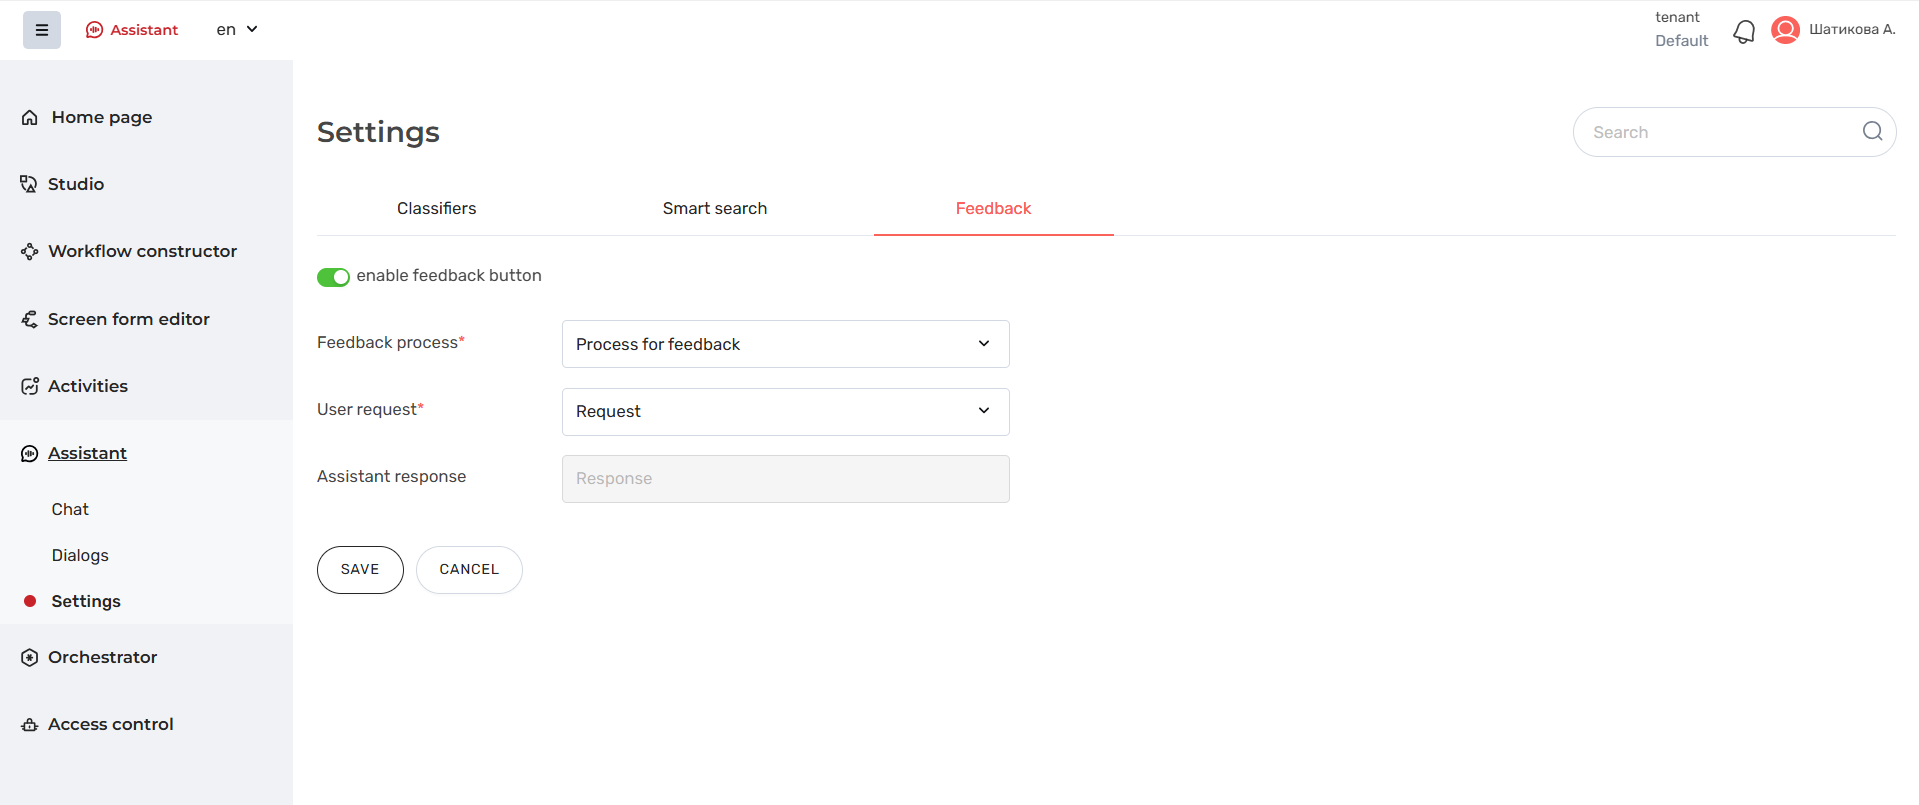
Description of the interface elements of the Feedback tab in the editing mode
Element name | Default value \ Available values | Description | |
|---|---|---|---|
Button Enable feedback button | Default: Off | The button indicates the presence of feedback in the chat:
Editable if a workflow is selected in the Feedback workflow field | |
Field with dropdown list Feedback workflow | Available values: All user-accessible published workflows that have two text type input parameters. | List of workflow names. workflows with exactly 2 parameters of type string at the start are displayed.
| |
Field with dropdown list User request | Available values: Two input parameters of the selected workflow | Name of the parameter used as a user request
| |
Field Assistant's answer | Available value: Input parameter not selected in the User request field | The name of the parameter used as the Assistant's response. The field is not editable.
| |
Button Save | – | Creates and saves feedback information When the button is clicked, the changes made are saved and the user remains in the Feedback tab in read mode | |
Button Cancel | – | Cancels creation/changes When the button is clicked, the changes made are not saved, the user remains in the Feedback tab in read mode | |
Field Widget | Subheading, displays the relationship of the field below to the setting of anonymous users' interaction with skills in the widget's chat room |
To edit the Feedback tab:
- The user must log in to ROBIN workflow 2.0.
- The system opens the Home page.
- The user selects the Assistant section, the Settings page, the Feedback tab.
- The user clicks the Edit button.
- The page enters edit mode.
- The user selects the published workflow in the Feedback workflow field and the input parameters for the User request field.
The user clicks the Save button.
The system checks whether the mandatory fields are filled in and whether the selected workflow exists.
If the check results are positive, the changes are saved, the user remains in the Feedback tab in the read mode.
If there is no access to the workflow, the fields Feedback workflow, User request, Assistant response are cleared. The user remains in the Feedback tab in the edit mode
The system displays a notification:
Save Error
The selected workflow is not available for use and proceeds to step 4.If the User clicks Cancel, the changes made are not saved, the User remains in the Feedback tab in the edit mode,
The system displays a notification:
Save Error
Required fields are not filled in and proceeds to step 4.
Обзор
Инструменты контента